Revopush User guide
This 5-minute guide will help you to set up your first Revopush integration
Set up with an AI agent
If you use an AI coding agent (Claude Code, Cursor, Codex, Gemini CLI, etc.), the fastest way to integrate Revopush is to install our official agent skills from the revopush/skills repository. The agent will then wire up the native iOS/Android (or Expo) changes, the JS codePush() wrapper, and the deployment keys for you — for both plain React Native and Expo projects.
Install the skills
For Claude Code, add the marketplace and install the plugin:
/plugin marketplace add revopush/skills
/plugin install revopush
For any other agent that supports the portable skills CLI:
npx skills add https://github.com/revopush/skillsAsk the agent to set up Revopush
Once the skill is installed, just describe what you want in plain language and the agent will pick up the right skill automatically. For example:
Set up Revopush OTA updates in my React Native app. Add the iOS and Android native integration, wrap my root component with
codePush(), and add a deployment key placeholder I can fill in.
For an Expo project:
Integrate Revopush OTA into my Expo project. Install the SDK and the Expo config plugin, configure the deployment keys in my app config, run prebuild, and wrap my root layout with
codePush().
TIP
You still need a Revopush account and an application with deployment keys (see below). The agent integrates the SDK in your codebase — you provide the keys from the dashboard and use the Revopush CLI to publish releases.
Prefer to do it by hand? Follow the manual steps below.
Create an account
First, you need to create an account at the following service: https://app.revopush.org/register
Create an application
- Go to Applications and add an application
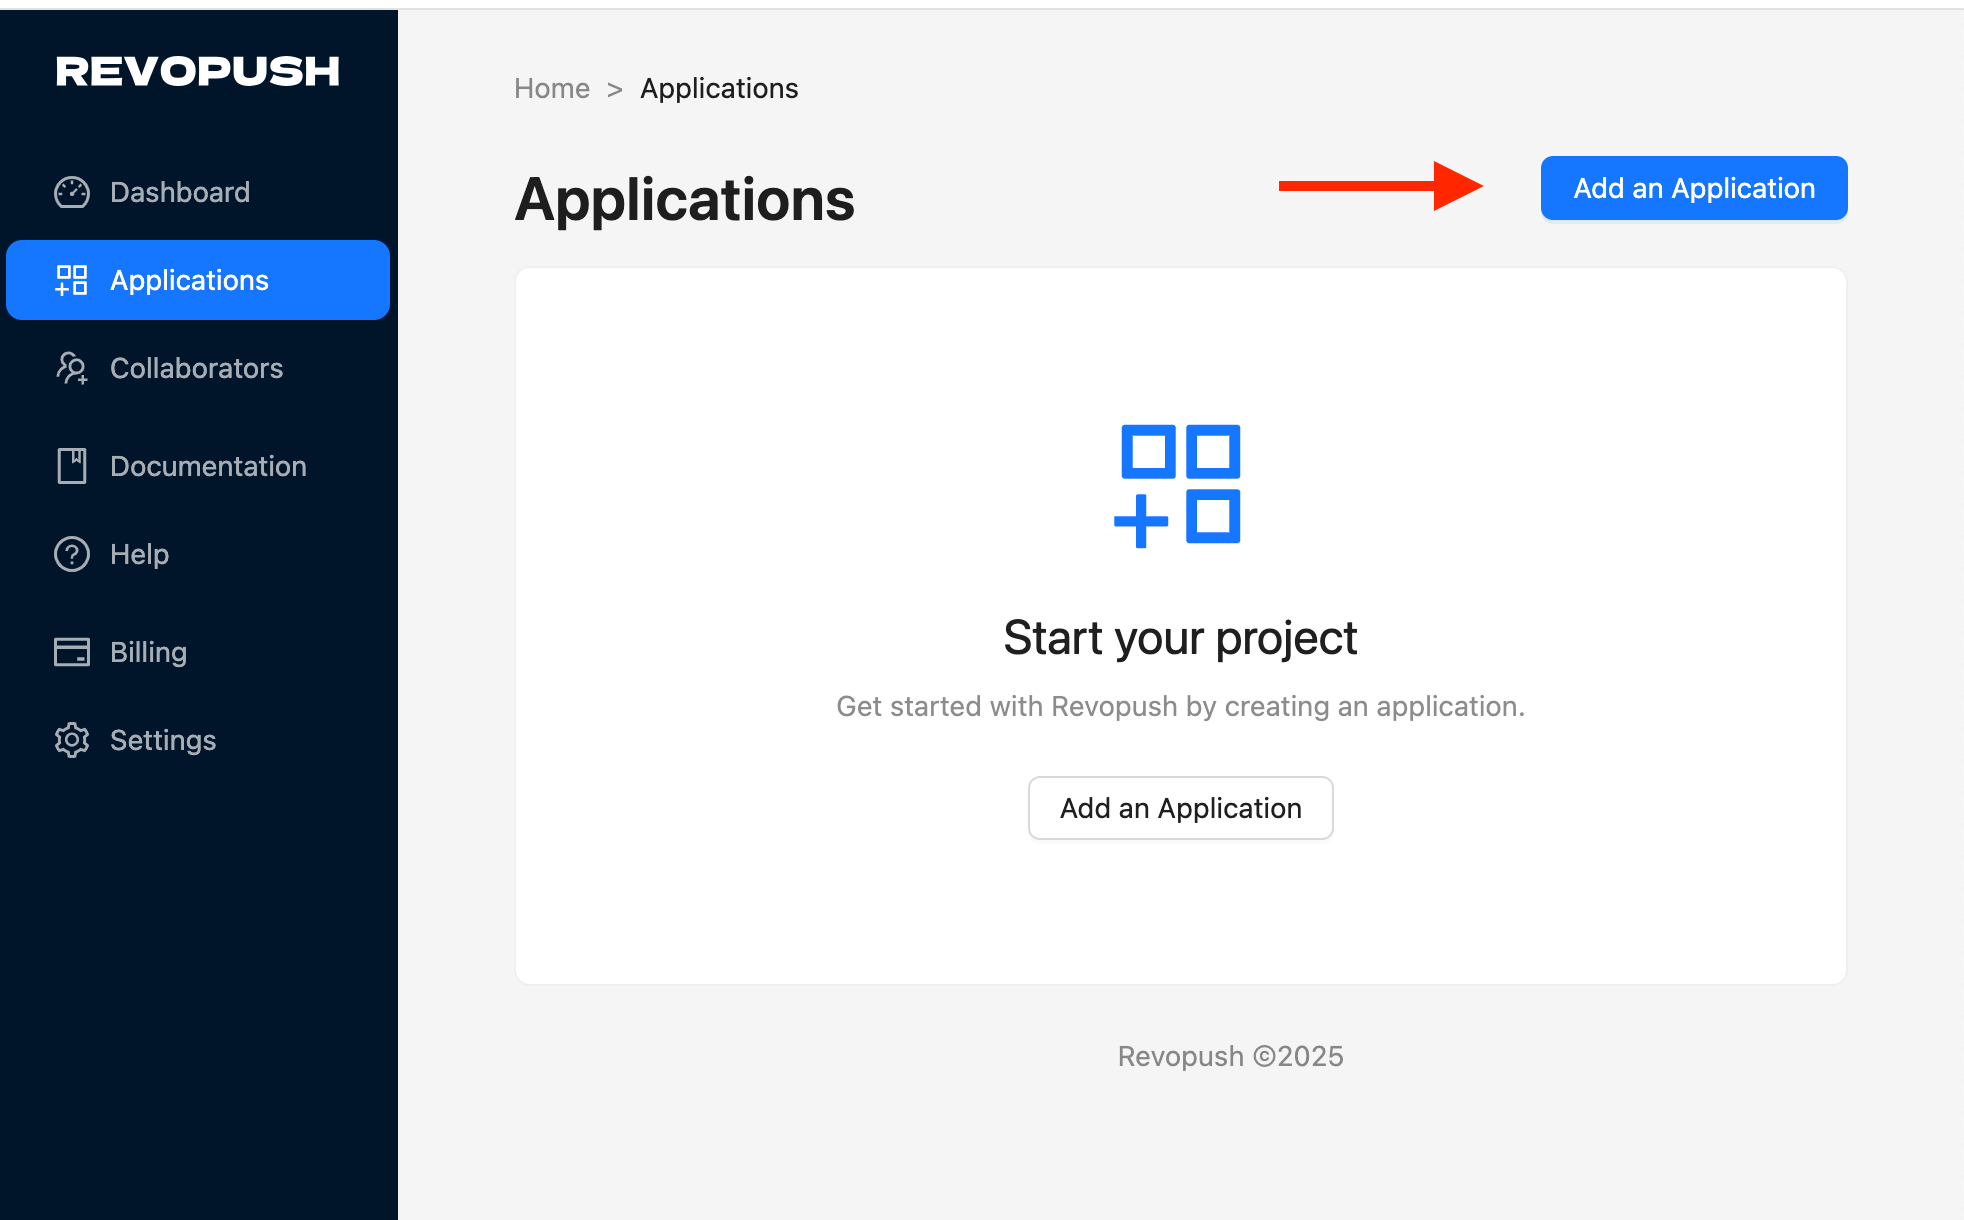
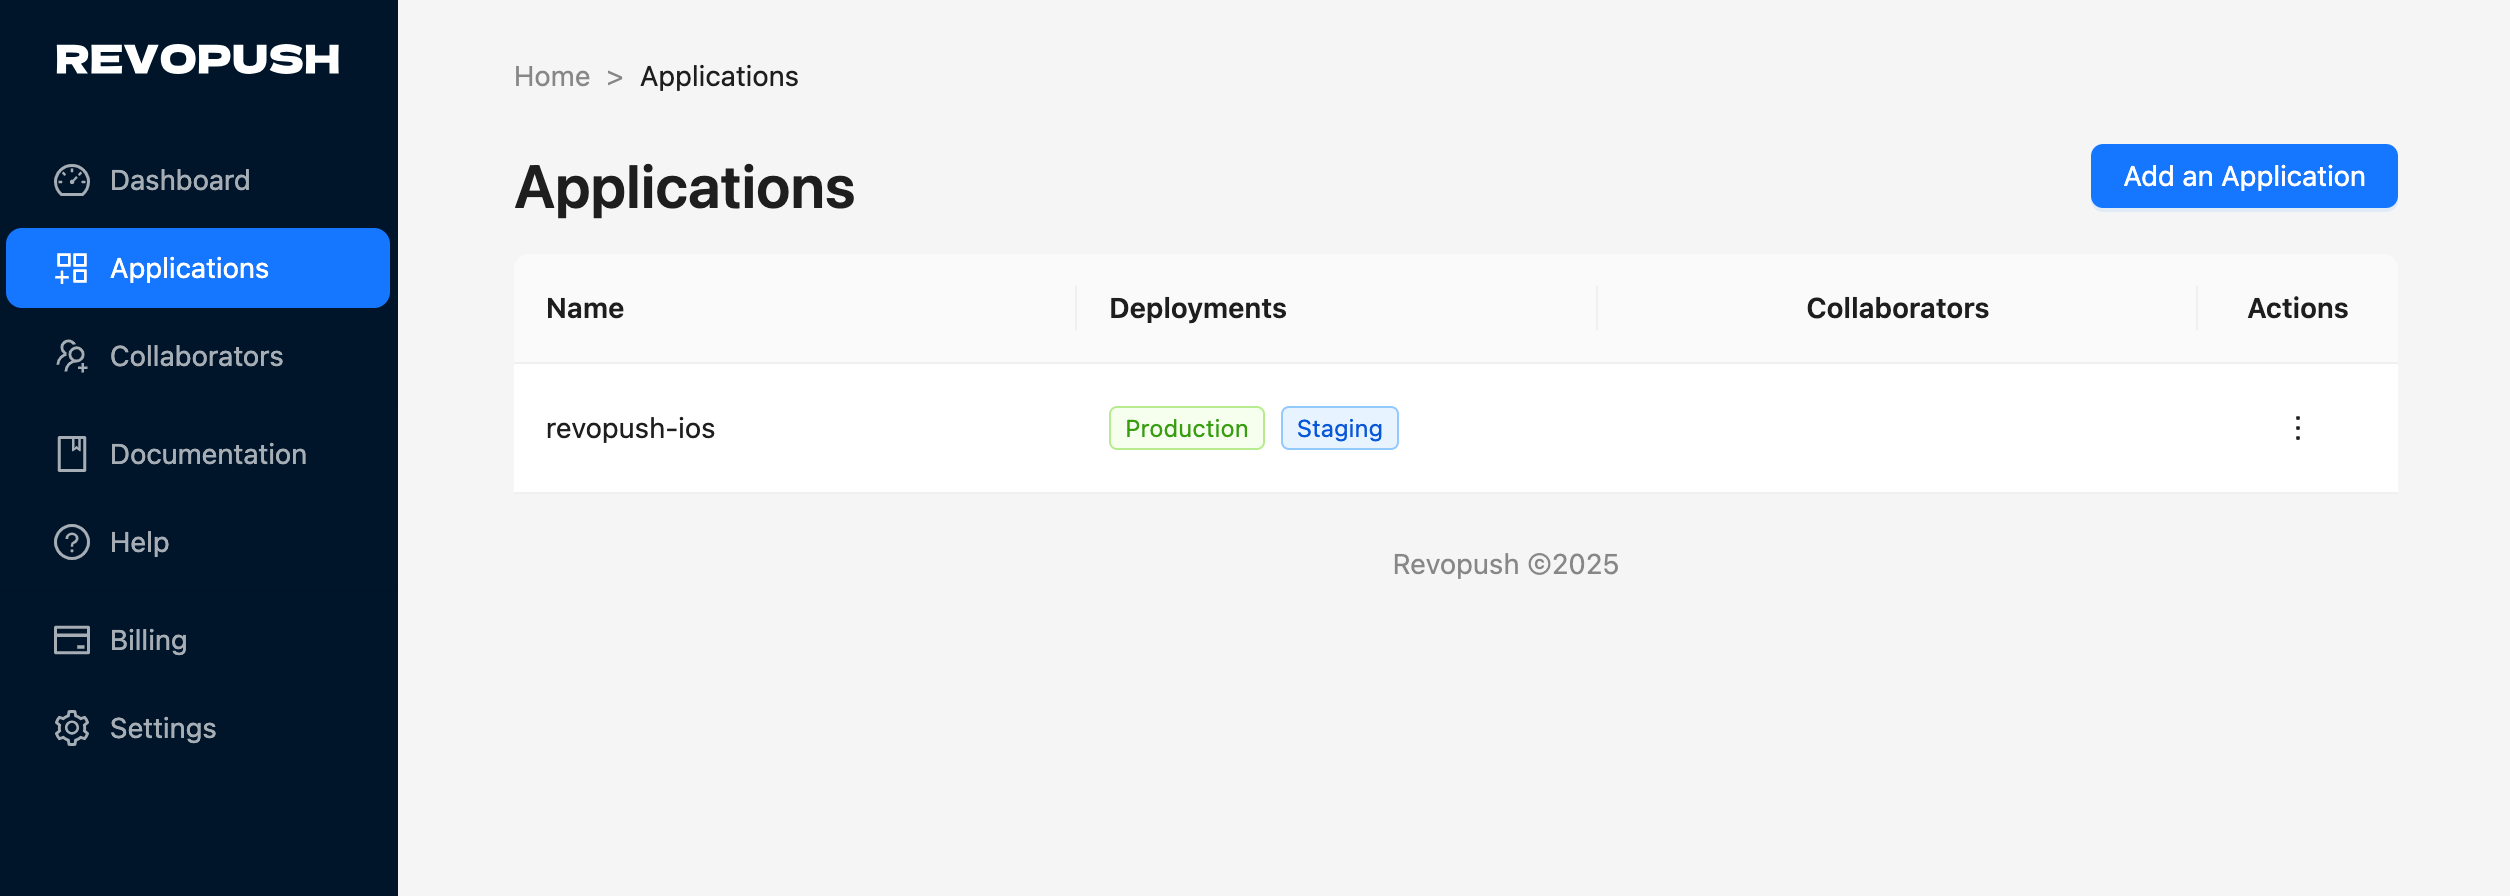
- Enter application name and save it
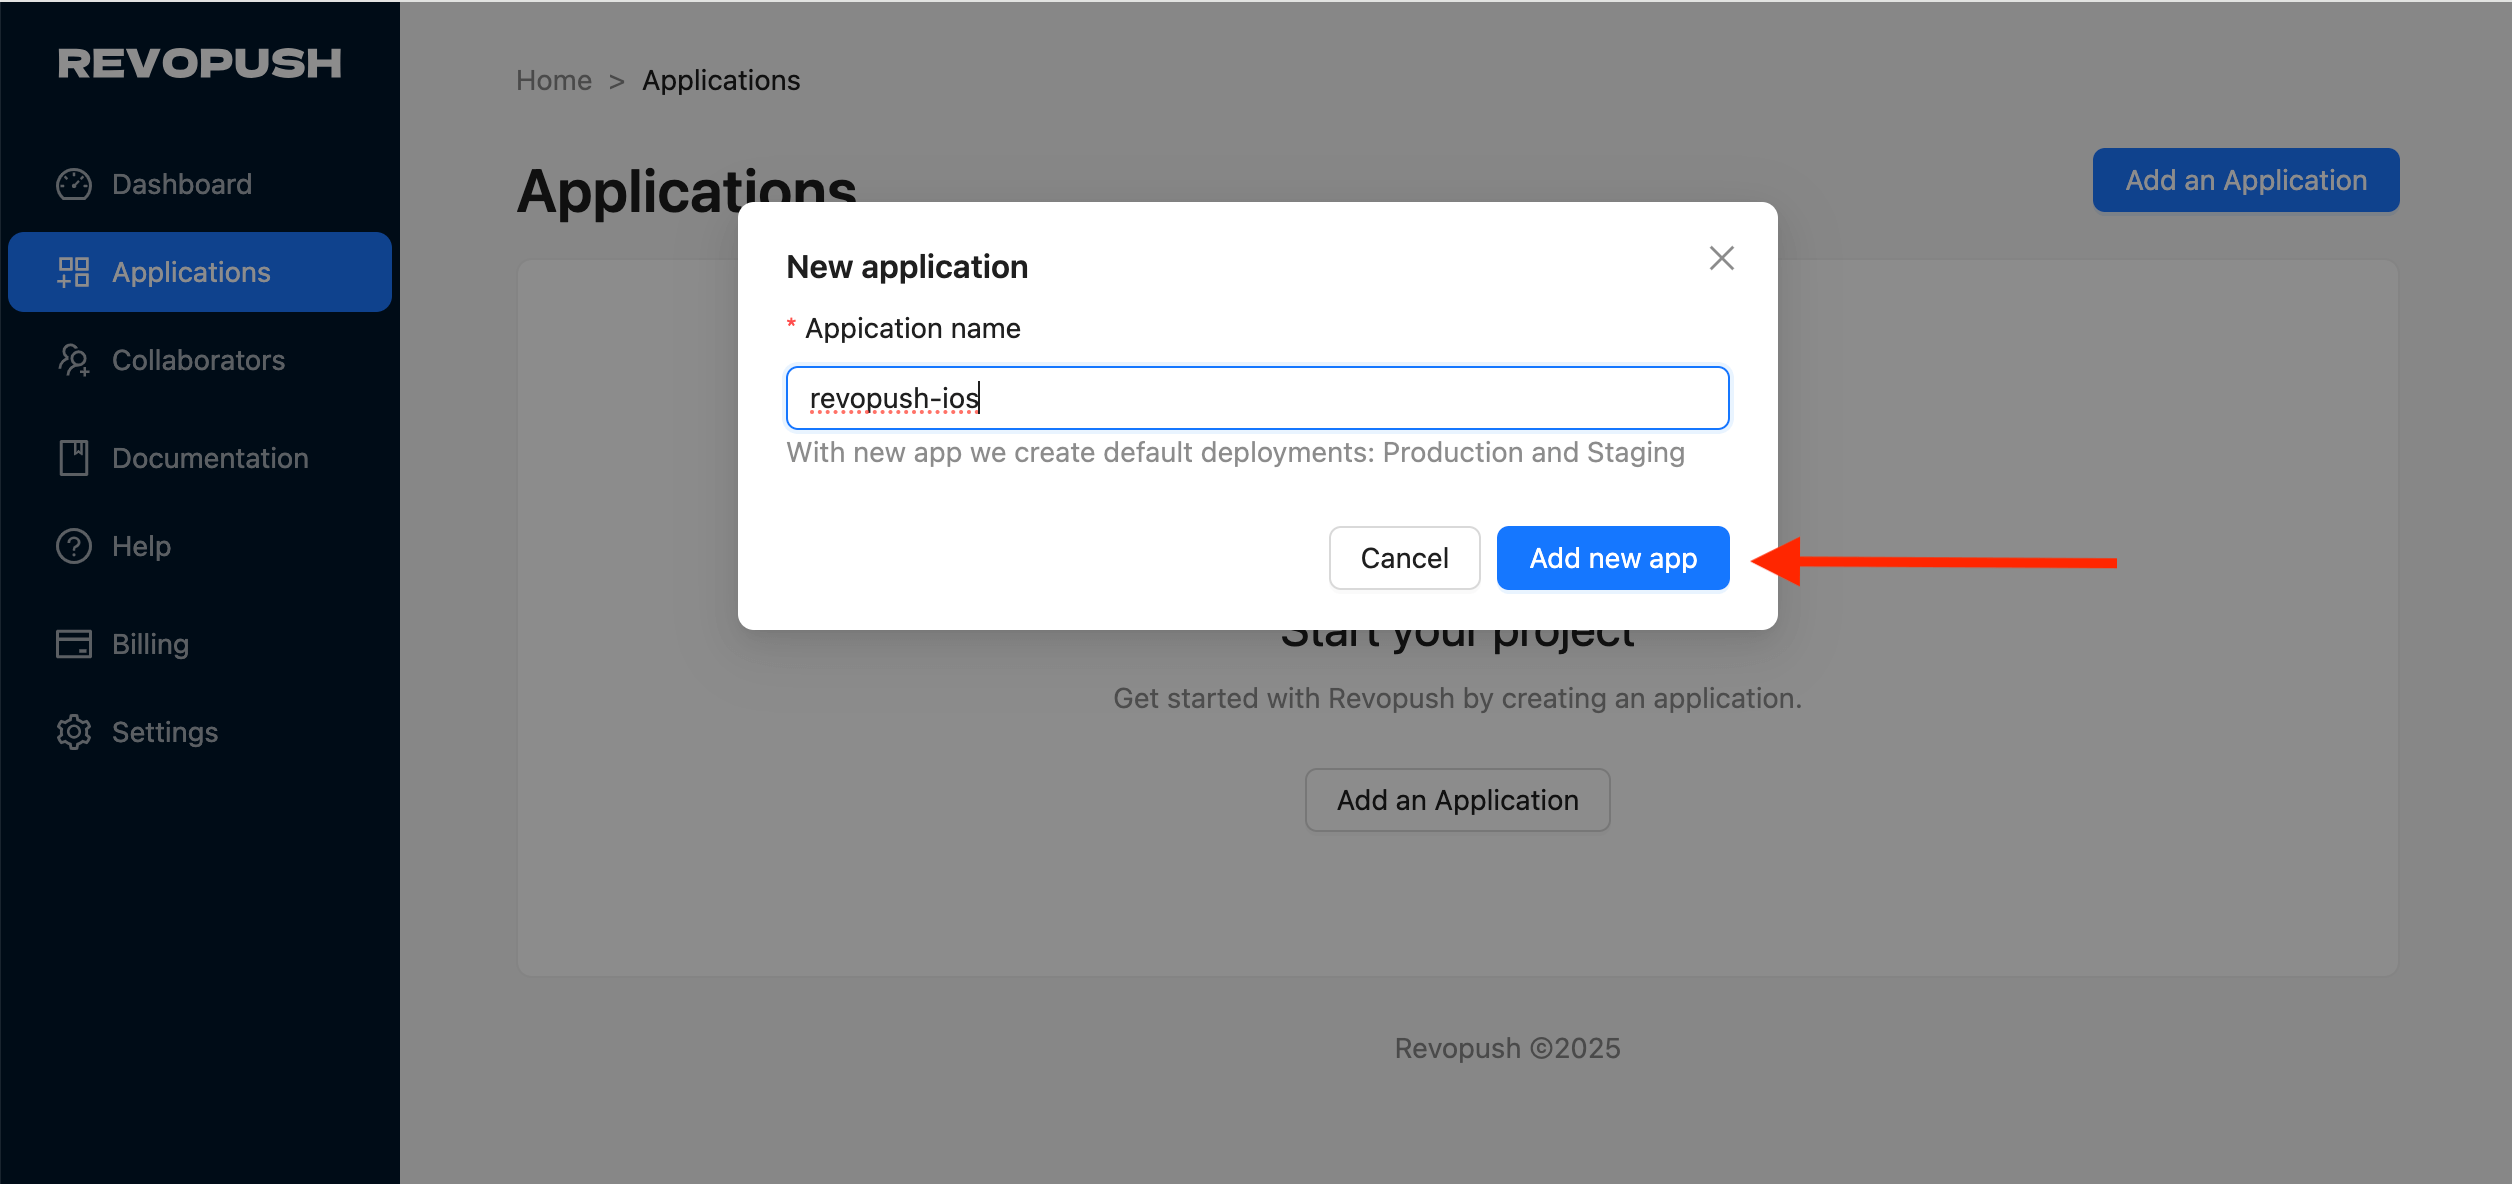
- As a result, you will see your application in the list with two deployments available out of the box
Setup mobile client SDK
First, you need to decide what client SDK to use. We support two options:
For React Native <0.76 and old architecture, you should stay on a Microsoft CodePush client SDK. Read here how to configure Microsoft CodePush SDK.
For React Native >=0.76, or you need support for New Architecture, you should use Revopush client SDK.
For Expo SDK 52+ follow Expo configuration instructions
| React Native version(s) | Supporting CodePush version(s) |
|---|---|
| <v0.76 | Use old Microsoft CodePush client |
| 0.76, 0.77, 0.78, 0.79, 0.80, 0.81 | Use Revopush SDK v1.5.1 and above (Support both New and Old Architectures) |
For this guide we will use Revopush SDK
Install Revopush client:
npm install --save @revopush/react-native-code-pushSetup iOS
Go to the ios/[ProjectName]/AppDelegate.swift and replace:
import CodePush

       override func bundleURL() -> URL? {
       #if DEBUG
           Bundle.main.url(forResource: "main", withExtension: "jsbundle")
           return CodePush.bundleURL()
       #else
           Bundle.main.url(forResource: "main", withExtension: "jsbundle")
           return CodePush.bundleURL()
       #endif
}
Go to the ios/[ProjectName]/AppDelegate.mm and replace:
#import <CodePush/CodePush.h>

- (NSURL *)bundleURL
{
    #if DEBUG
      return [[RCTBundleURLProvider sharedSettings] jsBundleURLForBundleRoot:@"index"];
    #else
      return [[NSBundle mainBundle] URLForResource:@"main" withExtension:@"jsbundle"];
      return [CodePush bundleURL];
    #endif
}
Mobile SDK needs iOS 15.5 and above. Specify a min ios target version in your application pod file:
platform :ios, min_ios_version_supported
platform :ios, '15.5'
Setup Android
Go to the android/app/build.gradle and add:
apply plugin: "com.android.application"
apply plugin: "org.jetbrains.kotlin.android"
apply plugin: "com.facebook.react"

apply from: "../../node_modules/@revopush/react-native-code-push/android/codepush.gradle"
Then apply changes to MainApplication.kt in the android/app/src/main/../MainApplication.kt
import com.facebook.react.soloader.OpenSourceMergedSoMapping
import com.facebook.soloader.SoLoader

import com.microsoft.codepush.react.CodePush

class MainApplication : Application(), ReactApplication {

  override val reactNativeHost: ReactNativeHost =
      object : DefaultReactNativeHost(this) {
        override fun getPackages(): List<ReactPackage> =
            PackageList(this).packages.apply {}

        override fun getJSBundleFile(): String {
            return CodePush.getJSBundleFile()
        }

        override fun getJSMainModuleName(): String = "index"
      }
}
After you configure your React Native application go to app settings to get Deployment keys:
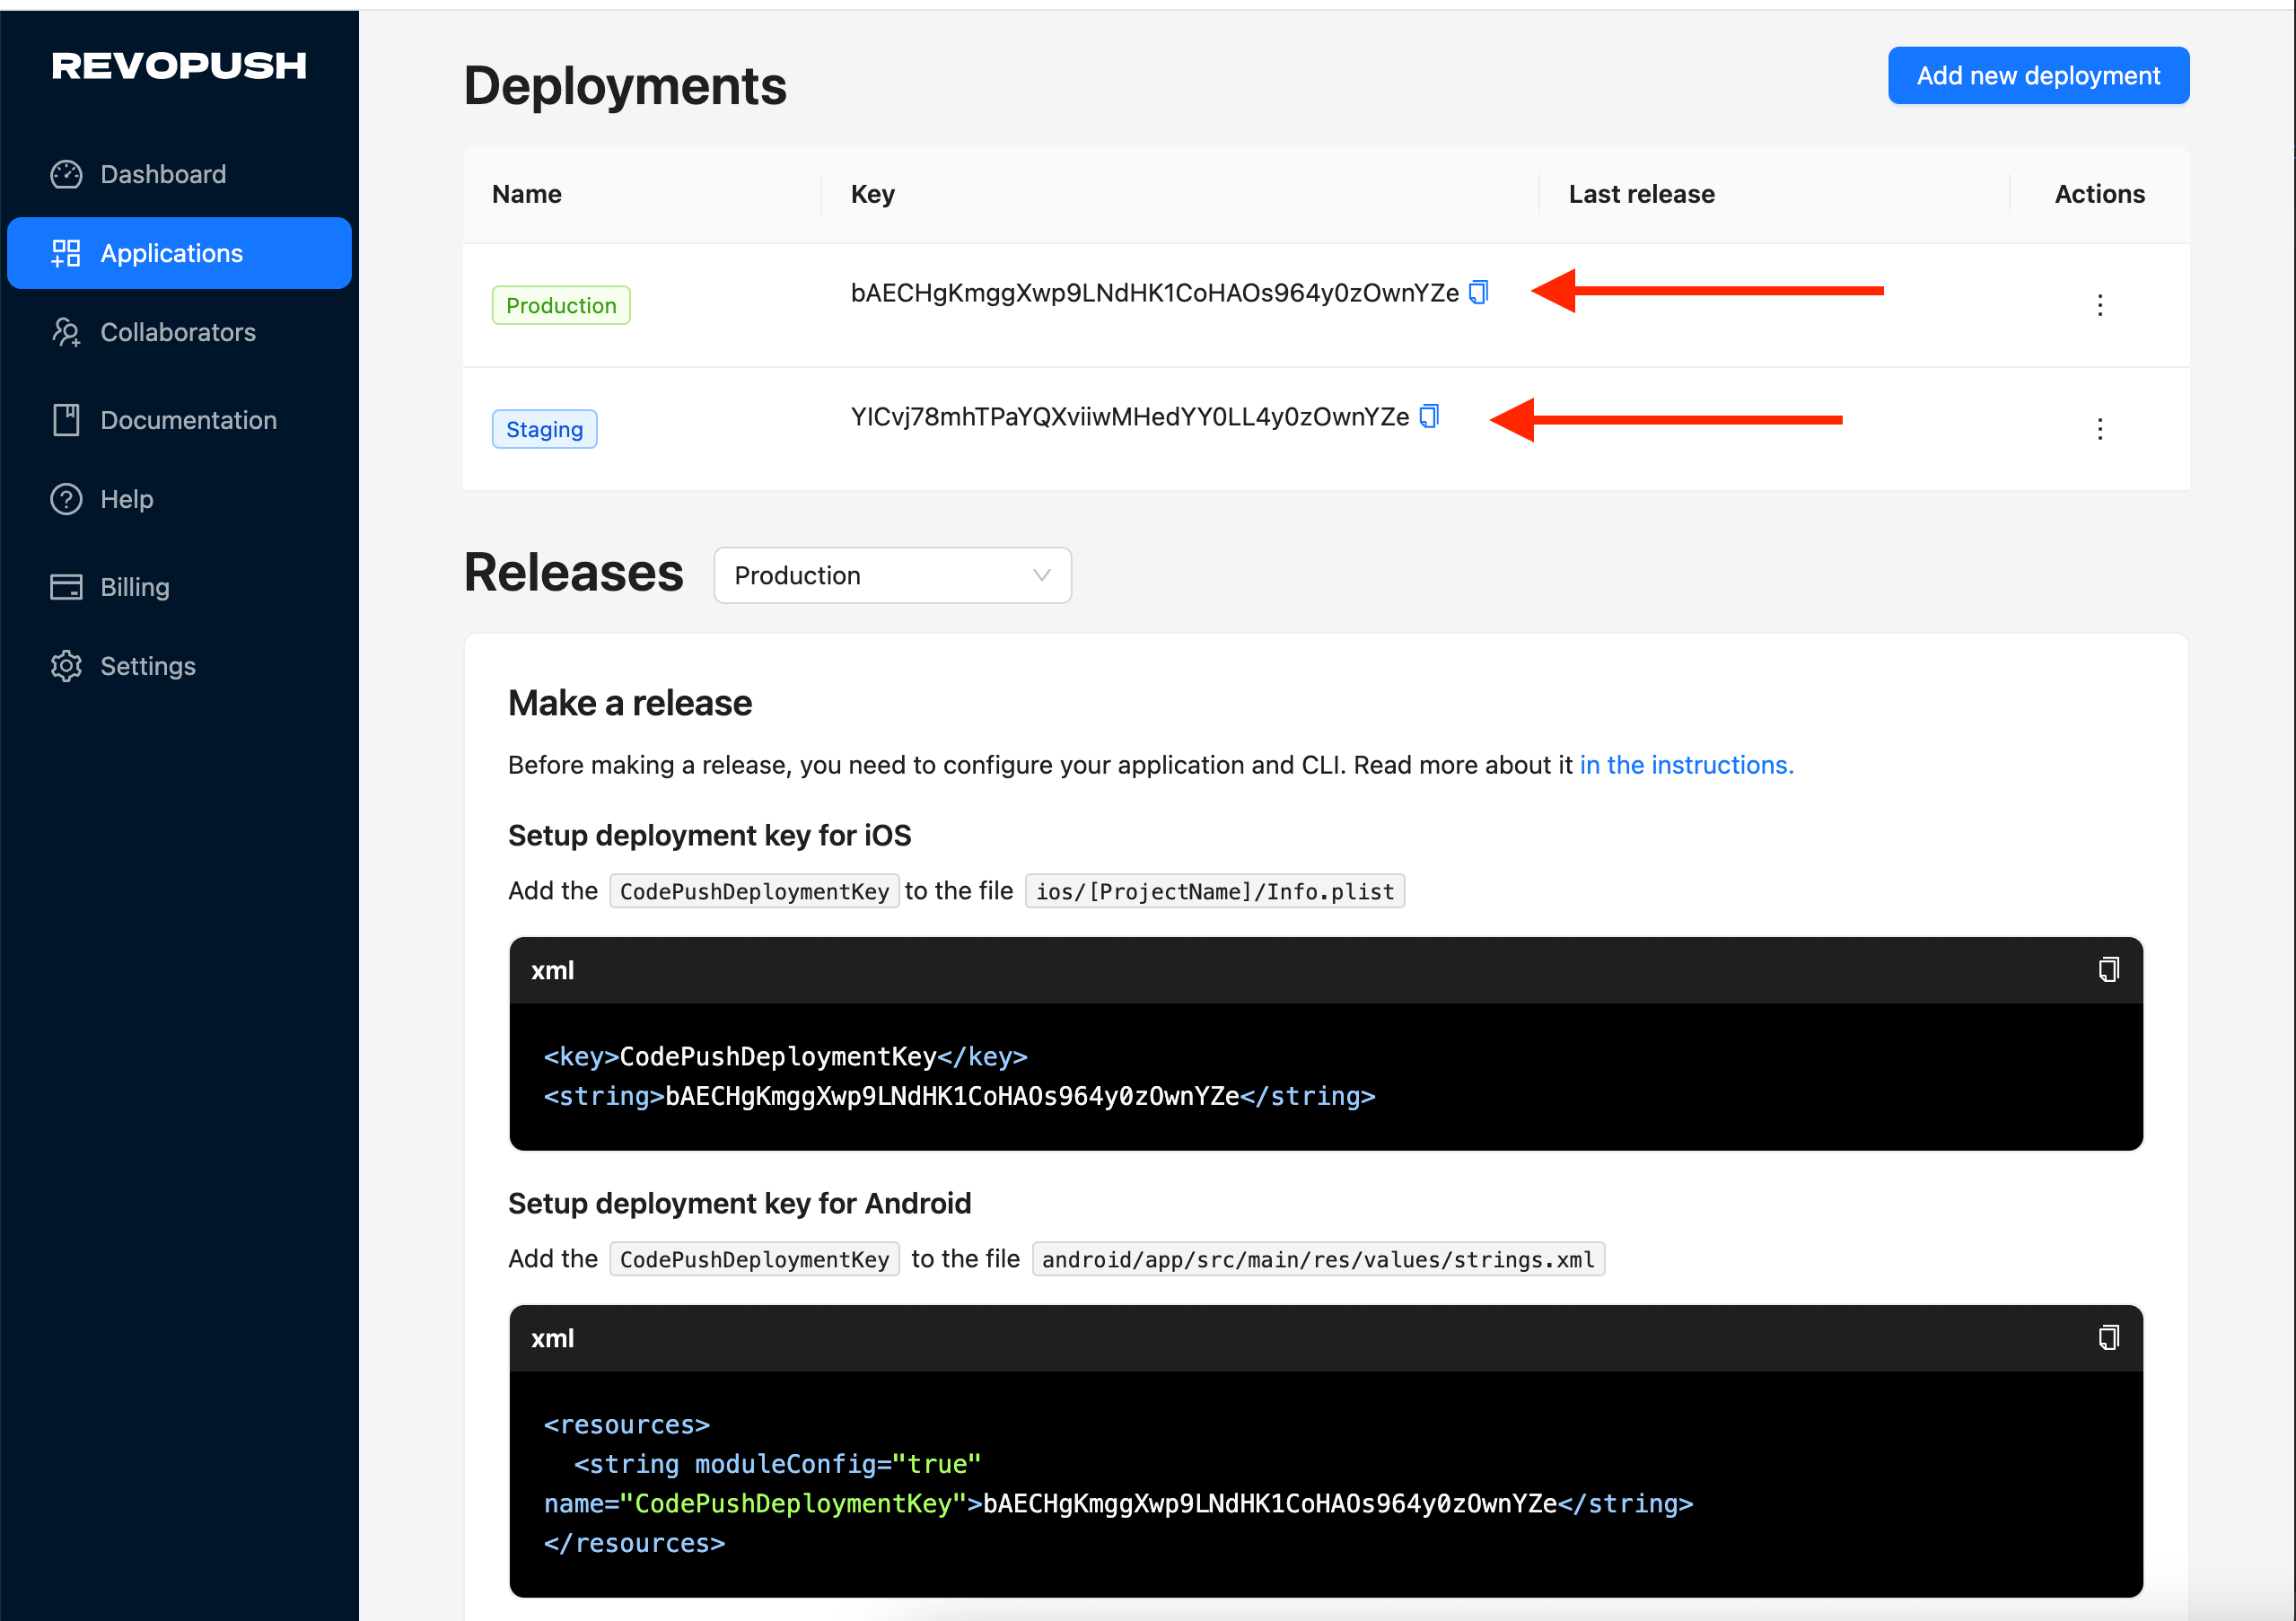
Setup deployment key for iOS
Add the CodePushServerURL and CodePushDeploymentKey to the file ios/[ProjectName]/Info.plist
<key>CodePushServerURL</key>
<string>https://api.revopush.org</string>
<key>CodePushDeploymentKey</key>
<string>YOUR_DEPLOYMENT_KEY</string>
Setup deployment key for Android
Add the CodePushServerUrl and CodePushDeploymentKey to the file android/app/src/main/res/values/strings.xml
<resources>
    <string moduleConfig="true" name="CodePushServerUrl">https://api.revopush.org</string>
    <string moduleConfig="true" name="CodePushDeploymentKey">YOUR_DEPLOYMENT_KEY</string>
</resources>
JS configuration
Configure the SDK in the JavaScript layer of your app (minimal setup):
import codePush from "@revopush/react-native-code-push";

class MyApp extends Component {}

MyApp = codePush(MyApp);
More details: JS SDK API
Configure CLI
After registration, install the Revopush CLI.
npm install -g @revopush/code-push-cliLogin to Revopush CLI using the following command:
revopush loginThis will launch a browser, asking you to authenticate with either your GitHub or Google account. This will generate an access key that you need to copy/paste into the CLI (it will prompt you for it). You are now successfully authenticated and can safely close your browser window.
Opening your browser...
Visit https://app.revopush.org/cli-login?hostname=<YOUR_HOST_NAME> and enter the code

Enter your access key:
Read more about Revopush CLI
Make a release
In the root folder of a React Native project, run these commands
revopush release-react <APPLICATION_NAME> ios -d <DEPLOYMENT_NAME>revopush release-react <APPLICATION_NAME> android -d <DEPLOYMENT_NAME>Read more about Releases in Releasing updates guide
Run application in release mode
If you want to test integration locally run the app in Release mode on an emulator or real device:
npx react-native run-ios --mode Release --no-packager
npx react-native run-android --mode Release --no-packager
This ensures the app doesn't rely on the local Metro bundler and uses the deployed update instead.